


Table of contents
Previously
You learned about Version Control System(VCS), How Git came into existence, and how it's different from other distributed VCSs, stages, and sections of a git initialized repository did some Hands-On practice with git and configured your Git username and password globally so that you don't have to fill them each time when you push or pull the changes
If these sound new to you, please check out this GIT'ting Up: Ground Zero blog, this should give you a brief overview of the topics mentioned above
Now that you have a 101 in Git and GitHub, let's delve more into it
Now
Git Branches
- Based on my experiences as an individual contributor to open-source projects, git branches are the way to do it, the changes I made need to be validated before, and then it is available for everyone
For an open-source project, folks are contributing to it from different parts of the world and committing to a single/parent branch, so it gets complex to deal with it
Everyone might be contributing to various parts of the project, It is the main branch that will be used by people, it's better not to commit right to the main branch because our changes might contain errors
it's better to create a new branch and work from there on, and branches in git don't get a whole copy of the project
Git branches are lightweight because they are just a pointer to a commit, due to that performing operations are instantaneous like switching between branches, also try out learngitbranching
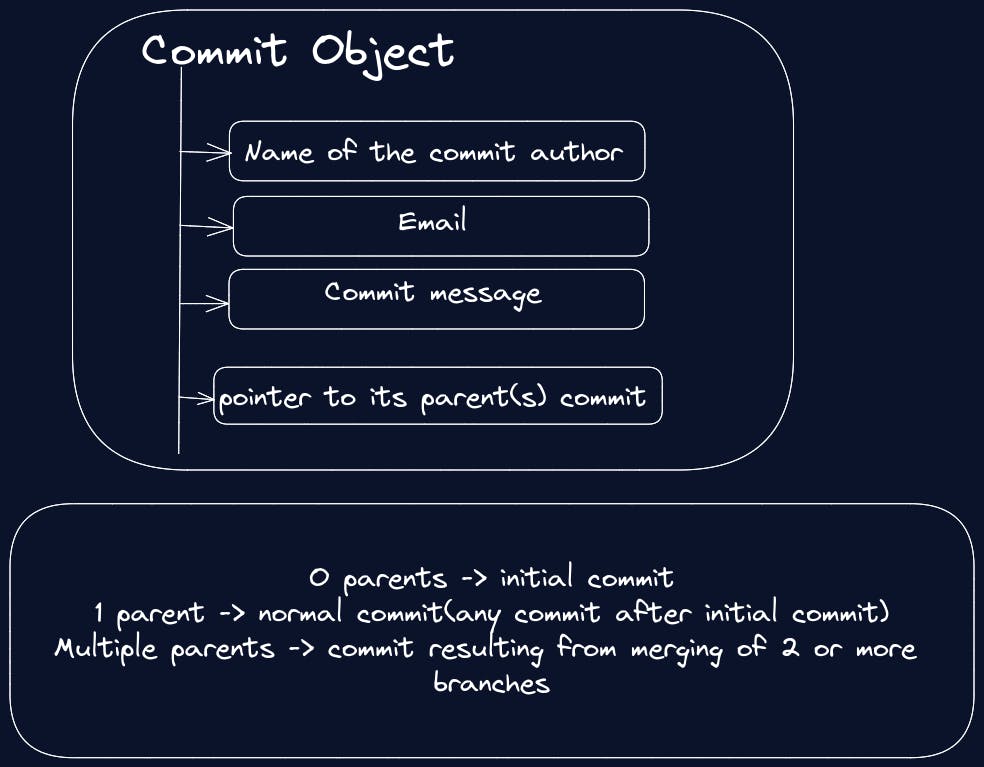
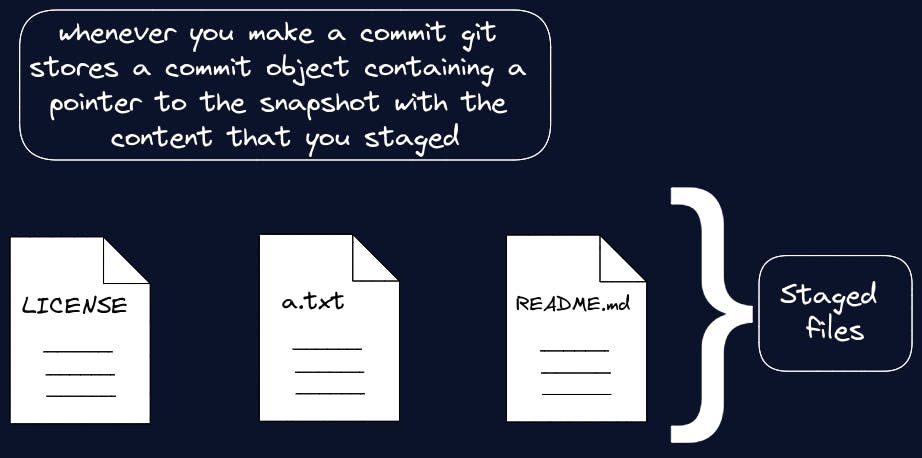
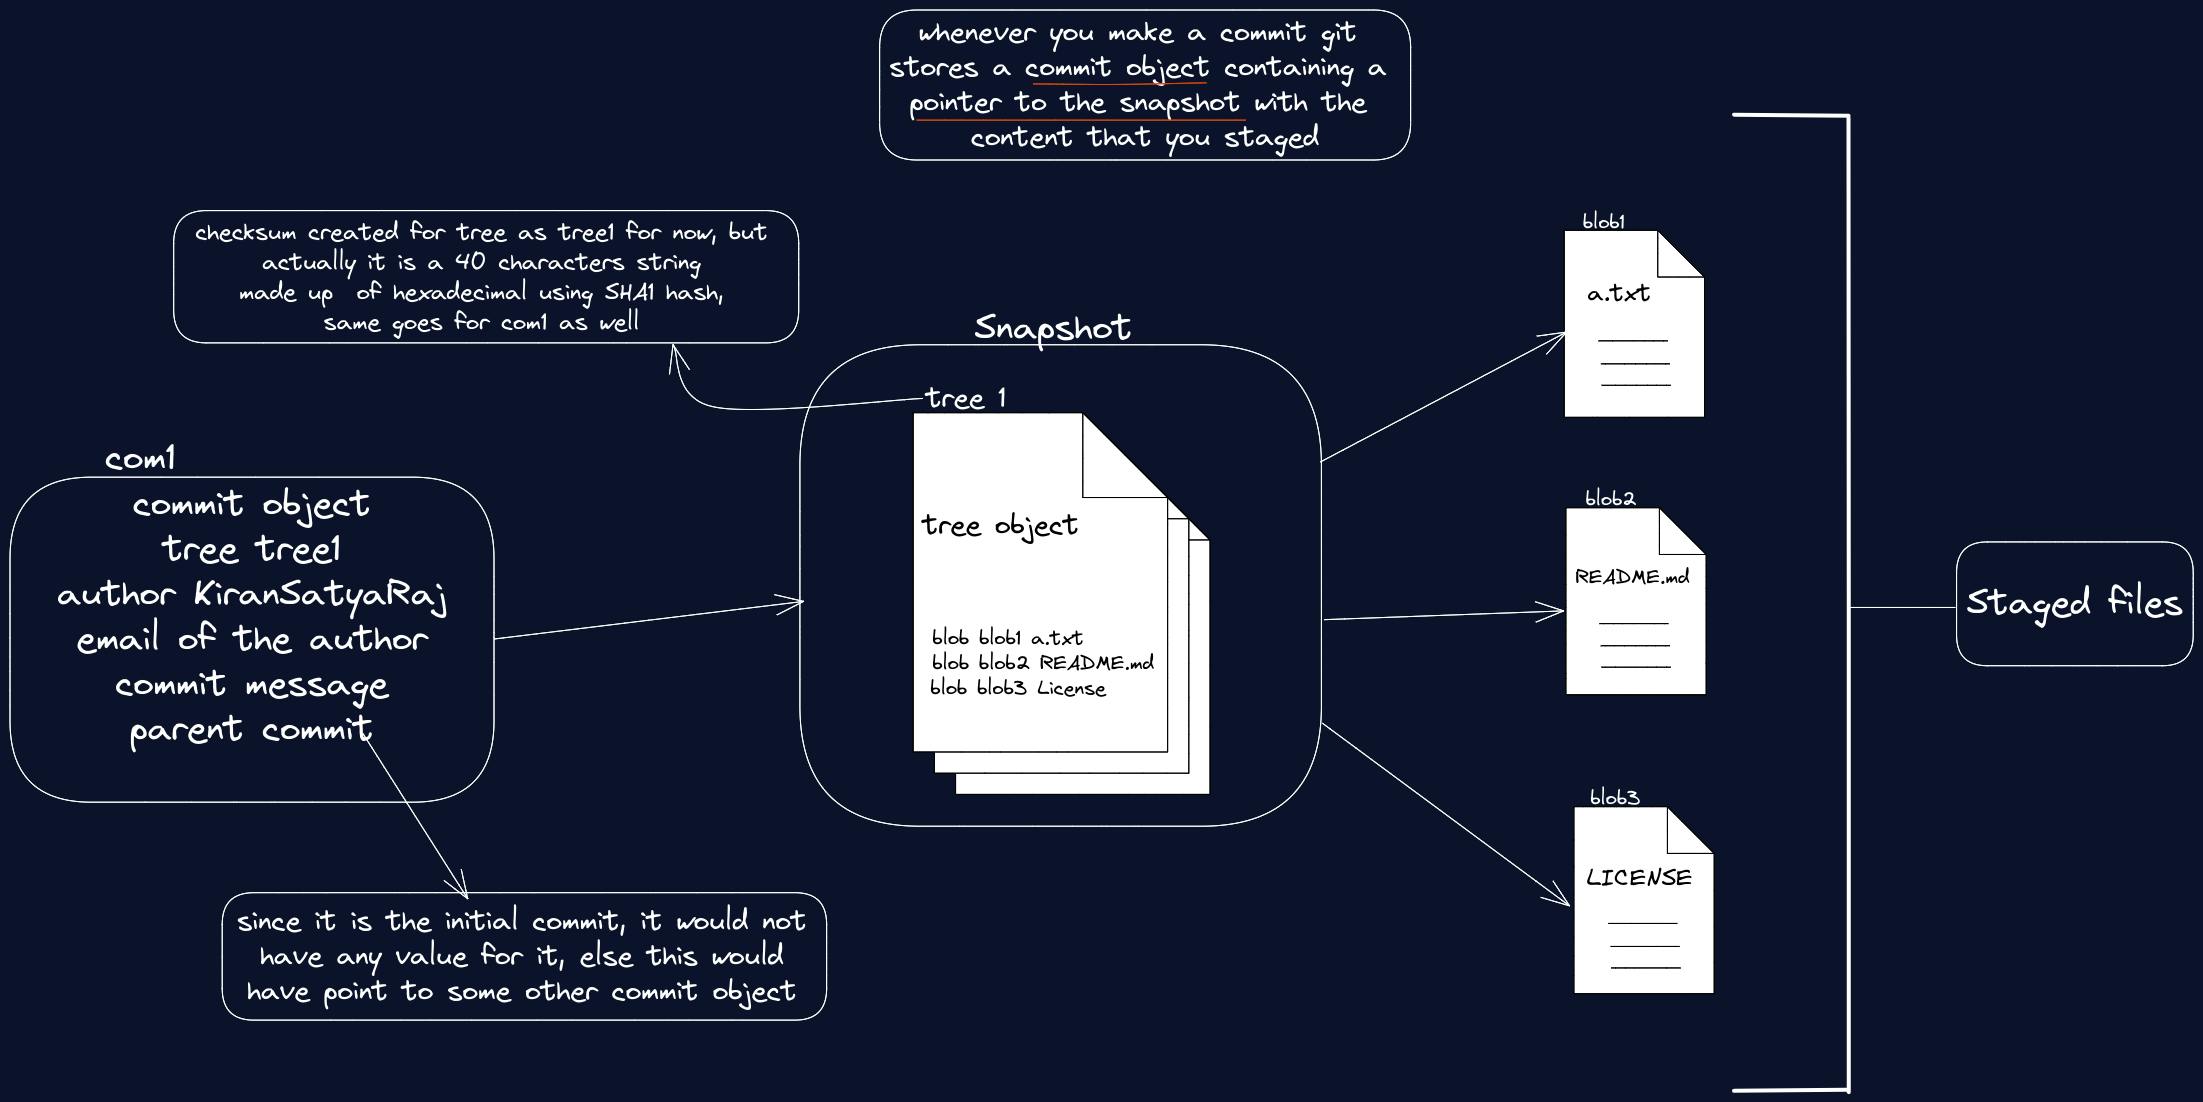
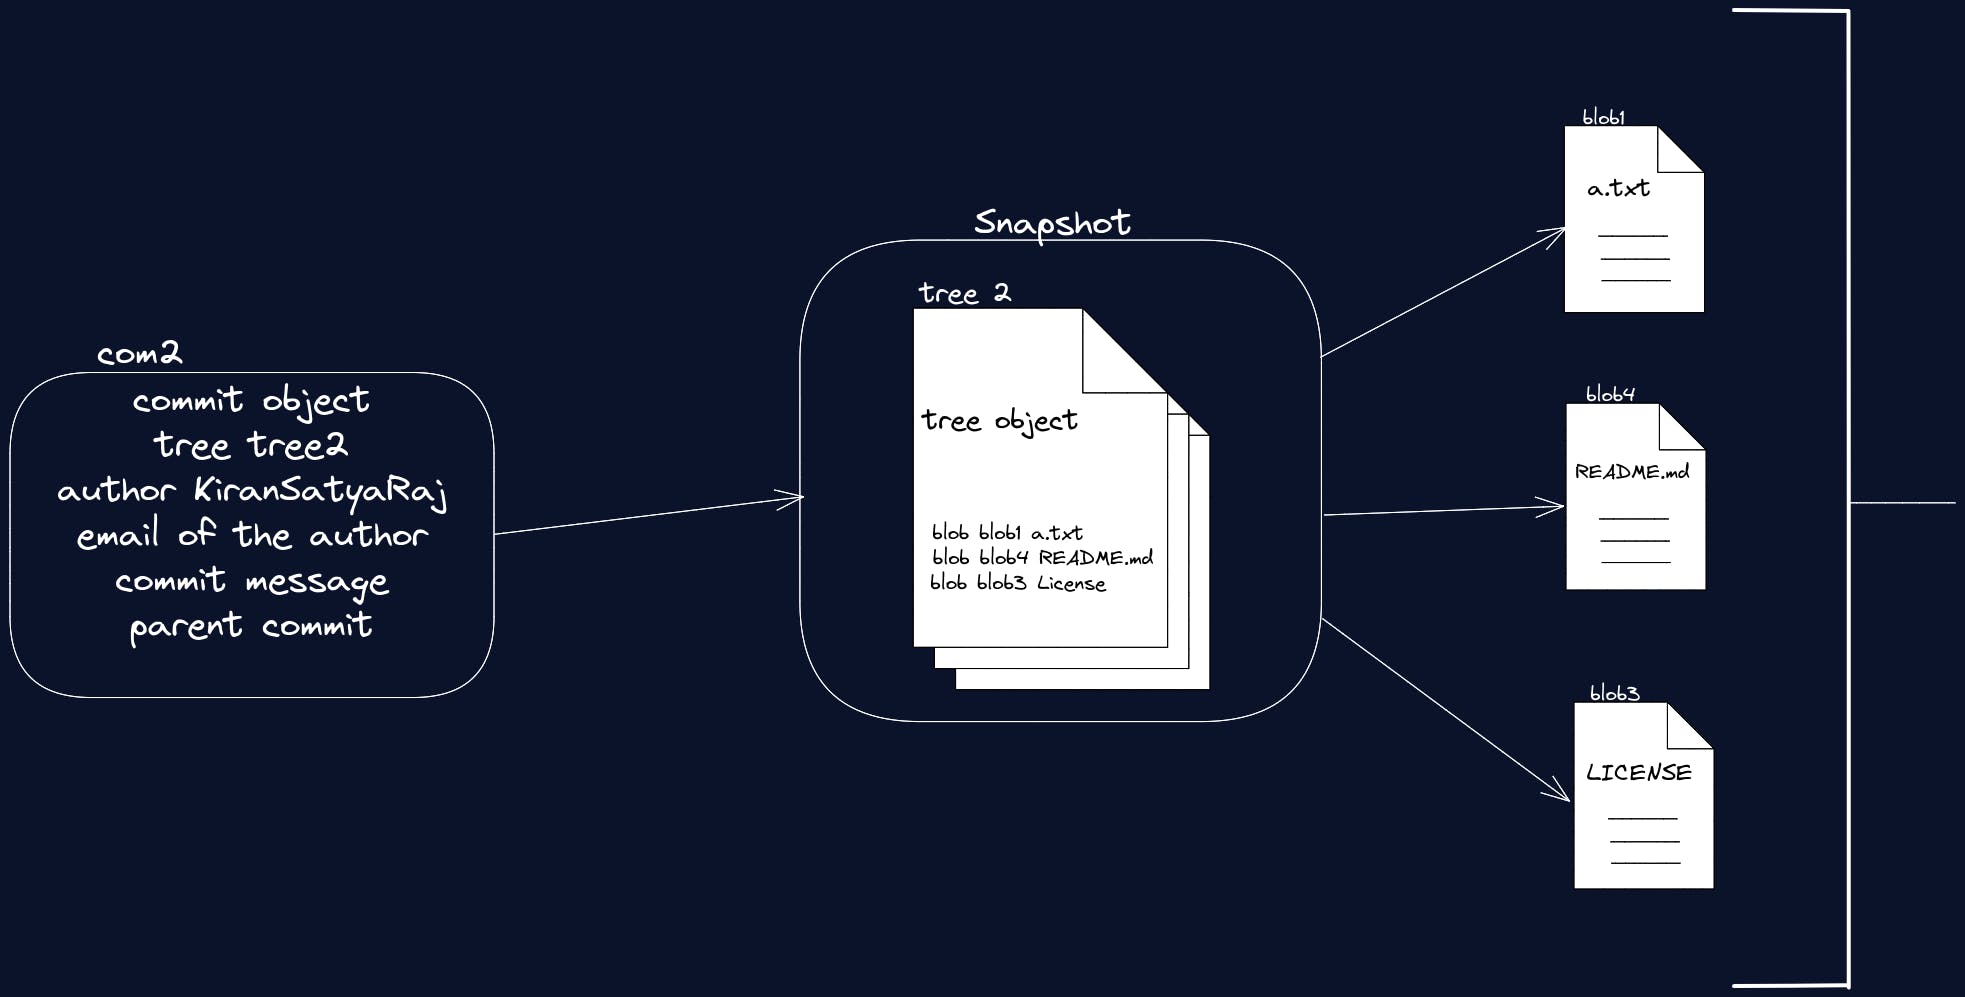
So whenever you make a commit git stores a commit object containing a pointer to the snapshot with the content that you staged
Let's see what's a commit object
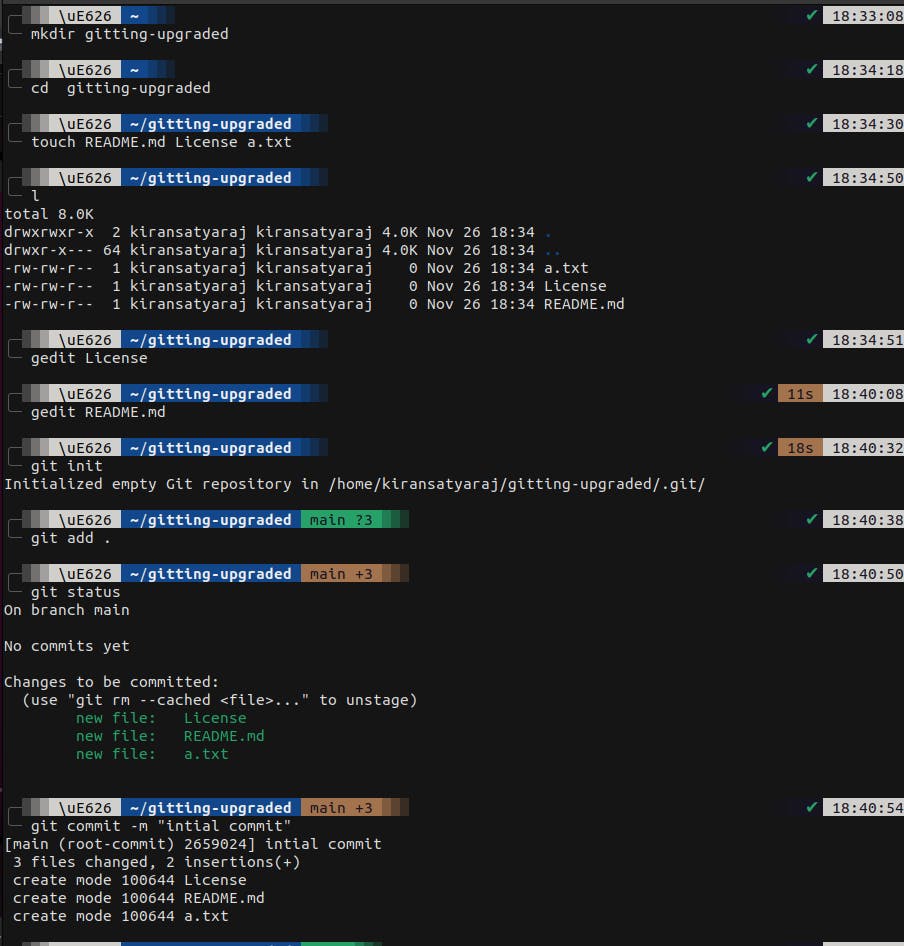
- Let's visualize the previous point, starting with creating a git repository
What exactly happens when we stage a file?
1. Computes a checksum for each file
2. Stores the version of the file in a Git(.git) repository (a.k.a blobs)
3. Adds the checksum into the staging area
- Now for all these staged files git creates a hexadecimal SHA1 HASH, let's call them blobs for now
When you create a commit
Git checksums each sub-directory and stores it as a tree object in Git(.git) repository
Whenever you make a change Git maps it to the snapshot of that particular blob
- Let's make another commit
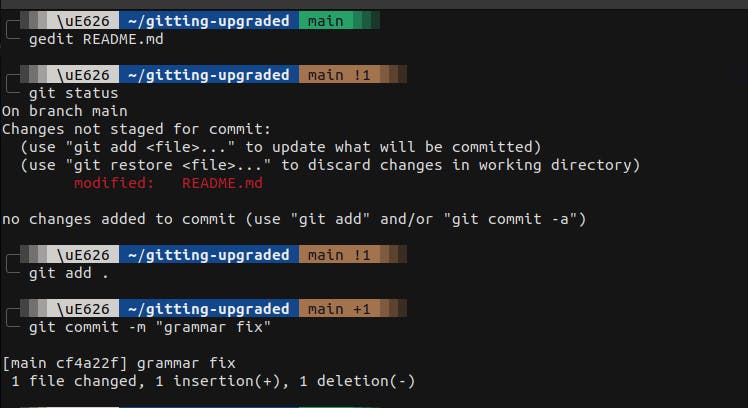
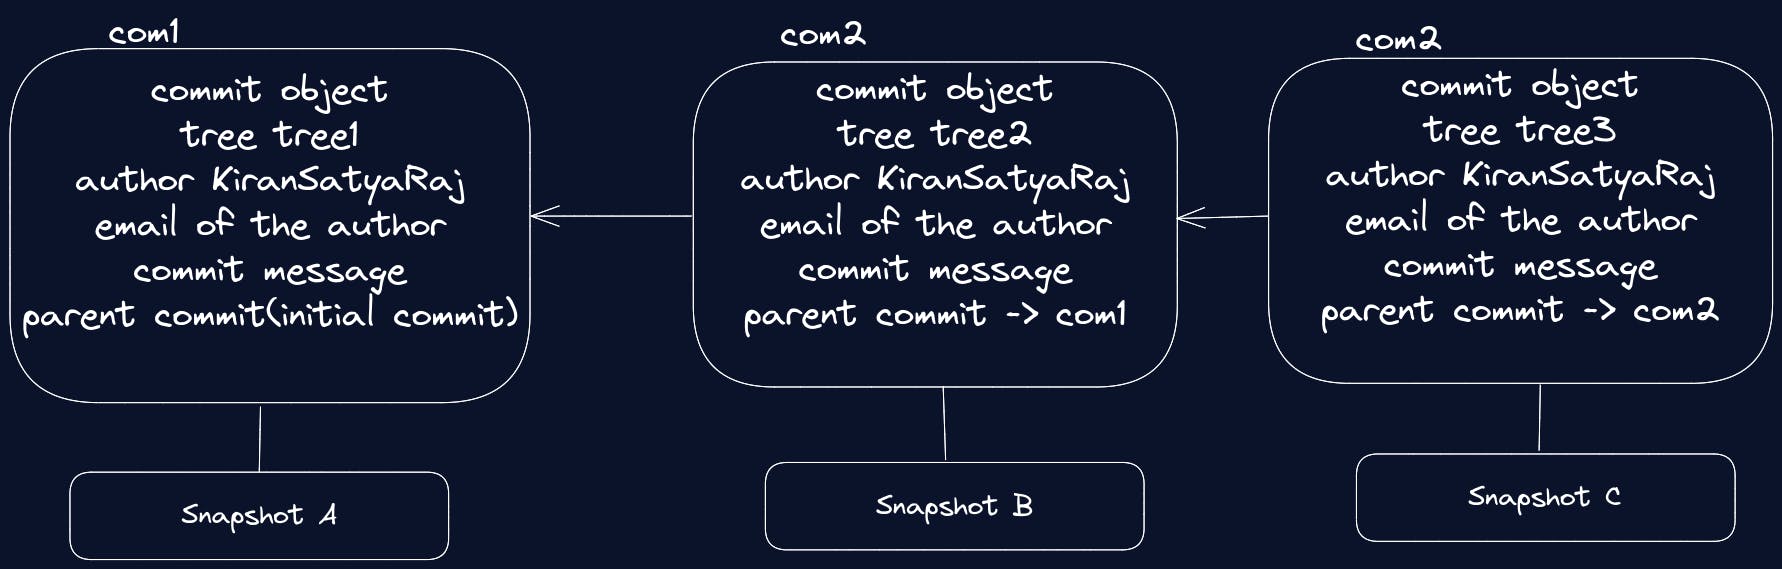
- Now do you think it creates a new copy of the files with a checksum for them since there's a change only in one file, it only makes a snapshot for the blob README.md with a checksum for it, here's what it does com1 -> com2, tree1 -> tree2, blob2 -> blob4
- Now let's see how commits are linked to each other with their respective snapshots
What are branches in Git?
Branches are a lightweight pointer allowing you to move to any commit you want to, that's a bit vague, let's understand them with a visual
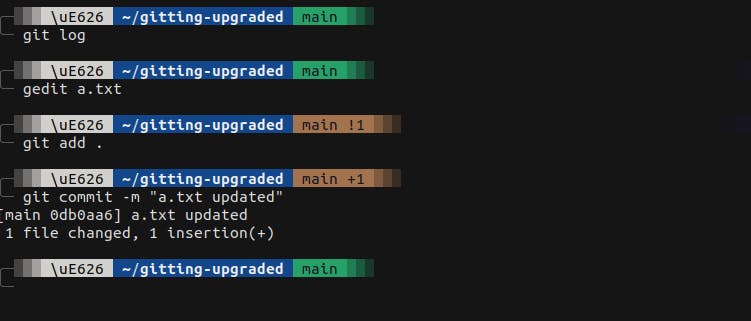
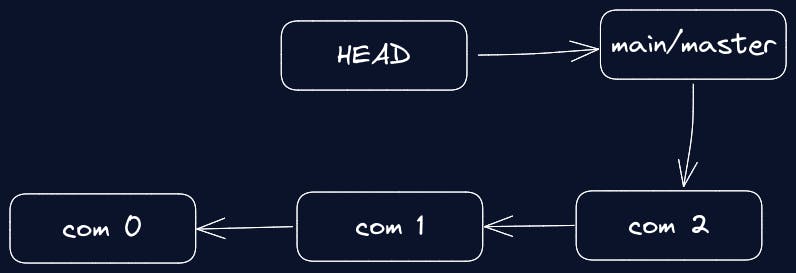
Let's make another commit, at this point we only have a single branch which is
main or masteryou can check that withgit branchand usegit logto see the commit history
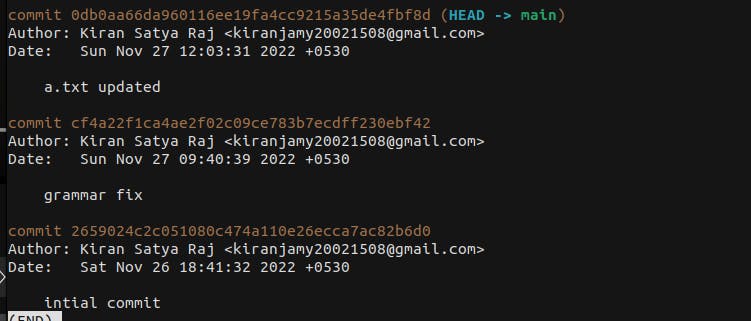
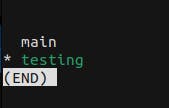
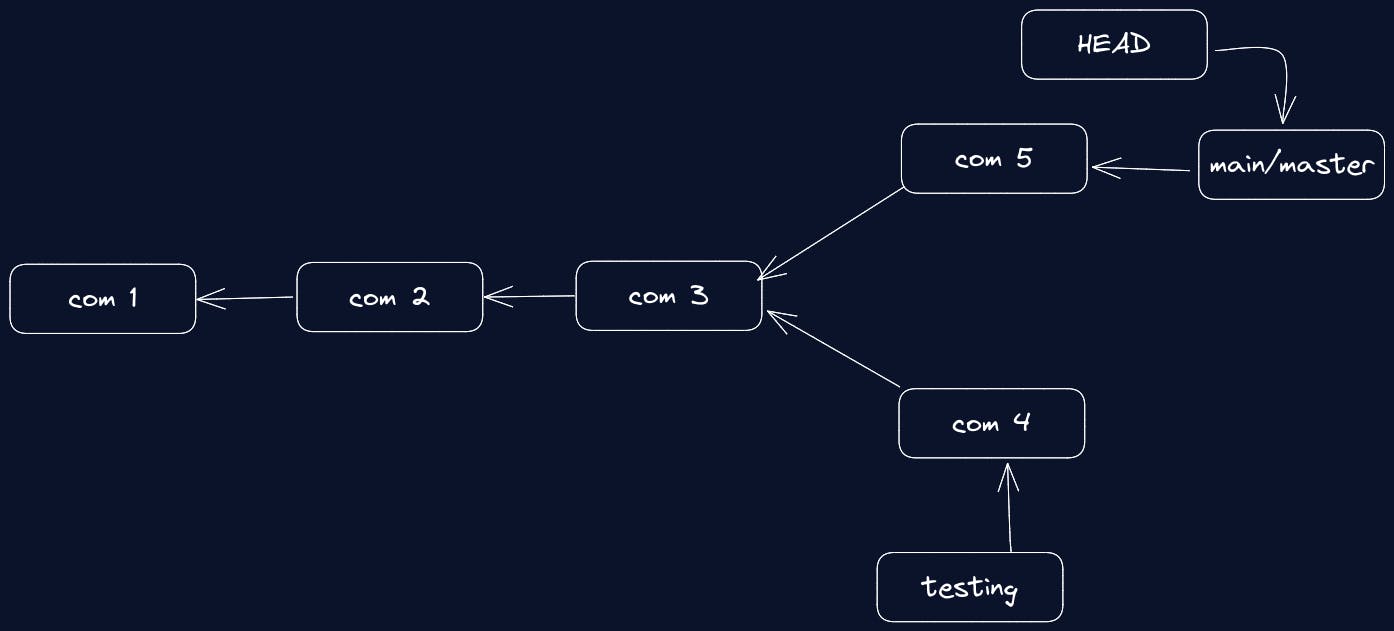
As you can see the
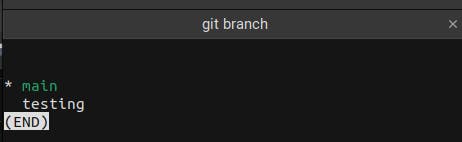
mainbranch is currently pointing to the third commit, now make a new branch usinggit branch <branch-name>, and now there'll be another pointer to the latest commit with the branch-name you just createdNow we have two branches, and how do you what is your working branch, from the below picture you can see the
asterisk (*)before the main branch, from the above pictures there's aHEADpointer to the working branch
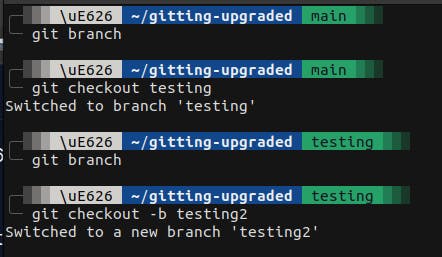
- If you want your branch other than main to be your working branch use
git checkout <branch-name>orgit checkout -b <branch-name>to create a new branch and switch to it
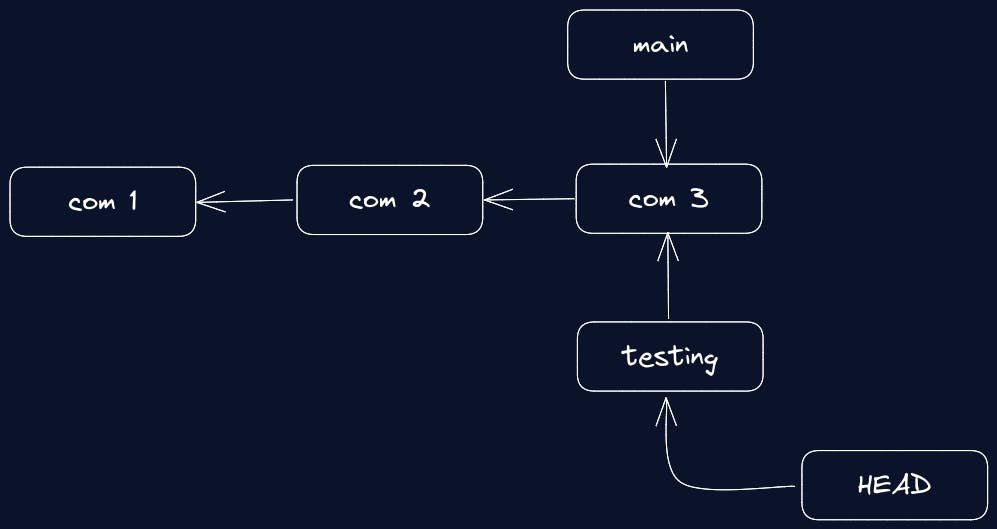
- Make another commit and the
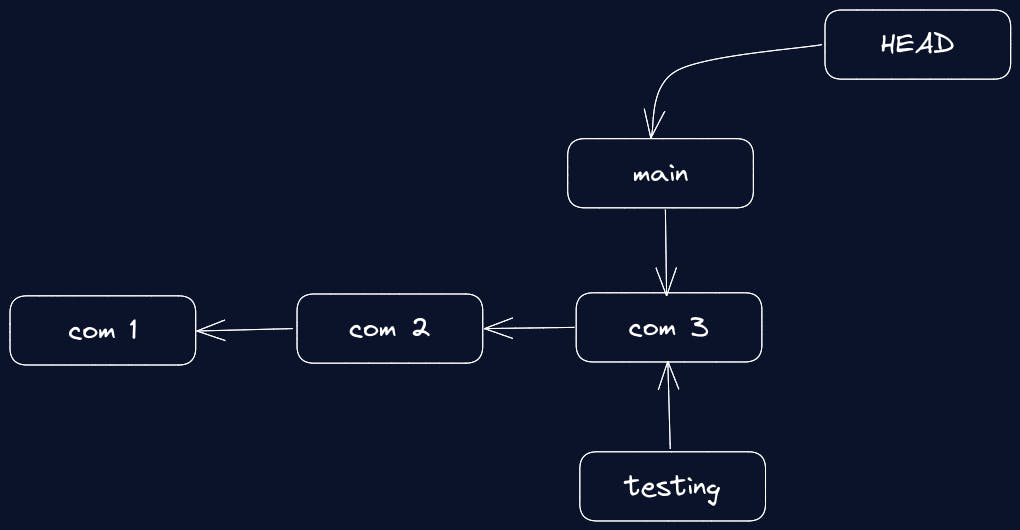
testingwill now point to the new commit and themaster/mainwill still point to the commit it was pointing before
- Let's verify whether the main is still a commit behind
- This proves that Git has reverted all the changes to the snapshot associated with commit-3, and any operations we perform from respective branches they're going to diverge from here onwards, to verify that, make a commit from the
main/masterbranch

A Git branch is a file containing 40 characters SHA1 checksum of the commit it's pointing to, deleting a branch is as simple as creating one using
git branch -D <branch-name>to delete it, but you have to switch to another branch before doing it, now you won't cut the branch when you're on it right, Git doesn't allow you to do that thoughYou can also use
git switch <branch-name>to switch the branch and to switch to the previous branch usegit switch -
Git Branches: Hands-On
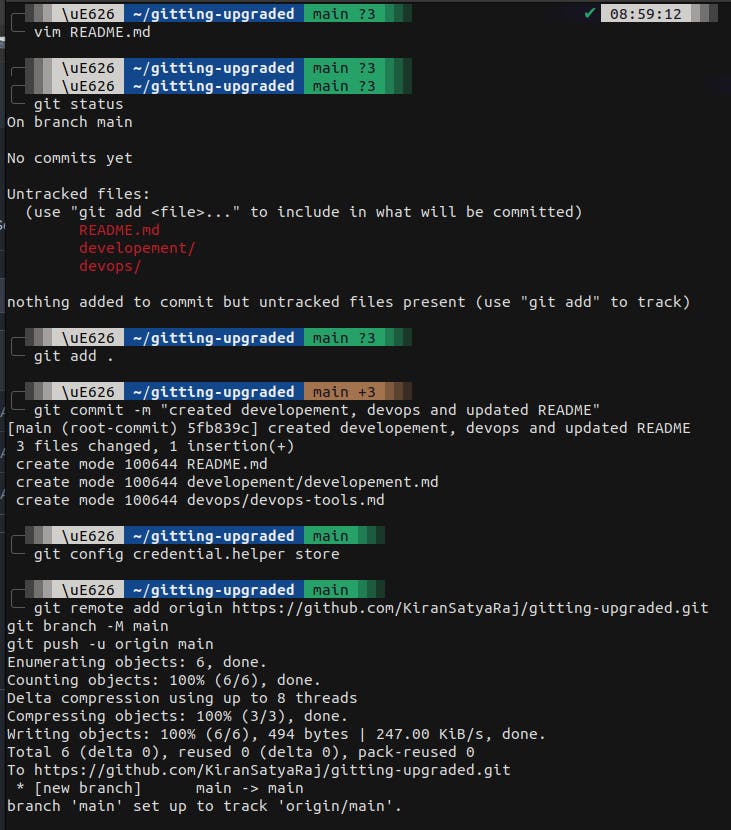
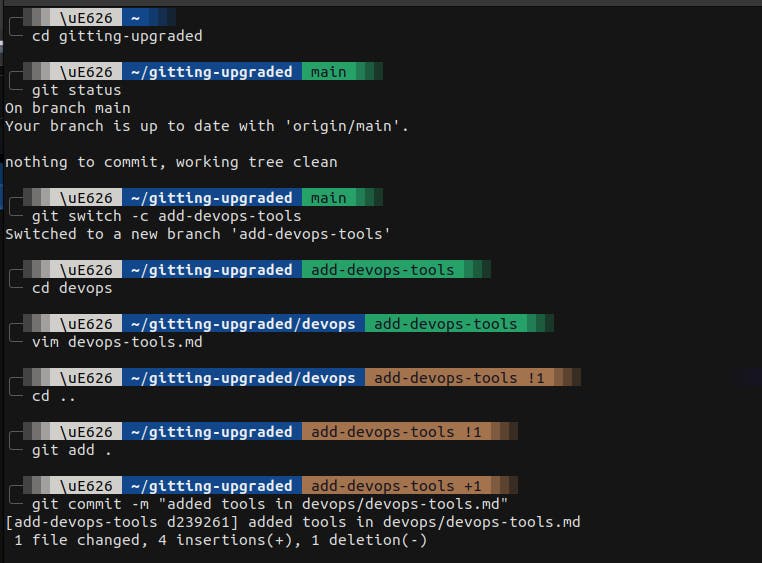
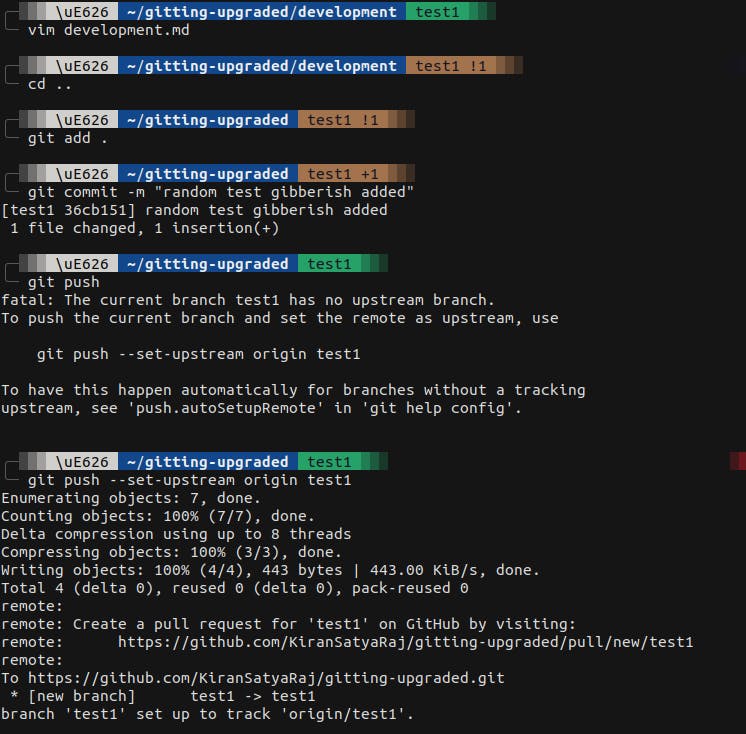
- Create a new GitHub repository with the same name as your local repository, if you don't have one, create the directory and some files and initialize Git, push the changes to the remote repository
- currently, you have 3 commits or for sake of understanding, let's assume you've made 3 commits and one working branch and your commit tree should look something like this
Creating New branch & committing changes
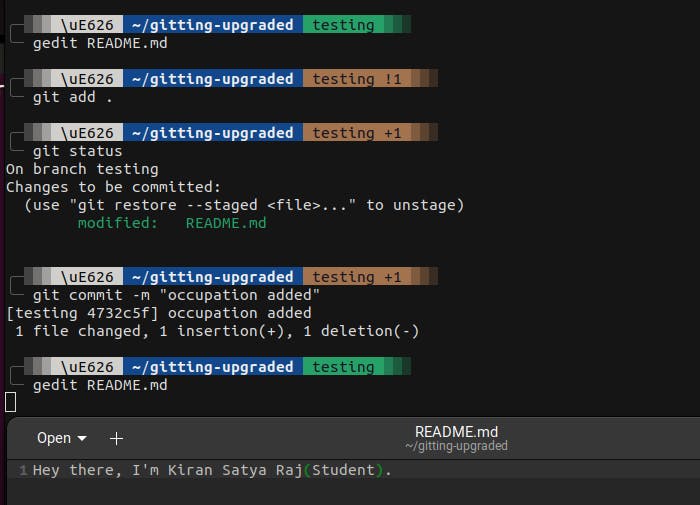
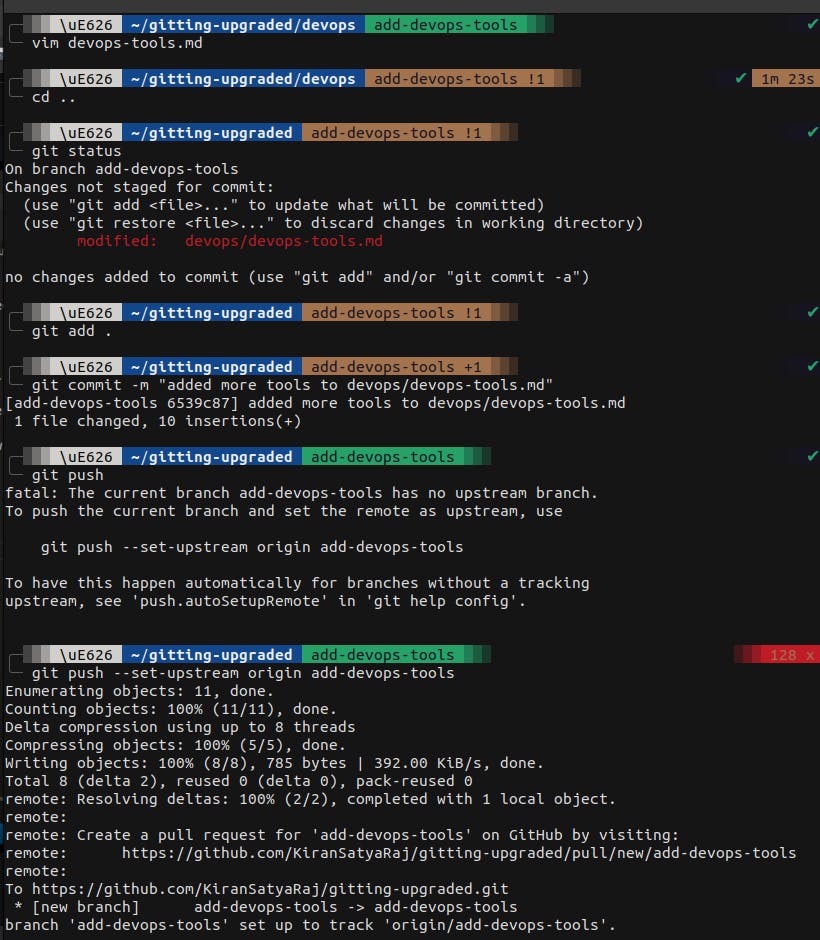
Now from here on whenever you want to make any changes, create a branch and then proceed, let's create another directory use
git switch -c <branch-name>to create and switch to the branchIt's good to keep the branch name more descriptive so that it says why it is created and what it does, currently, all the branches point to the latest commit, let's make a commit from the new branch you created
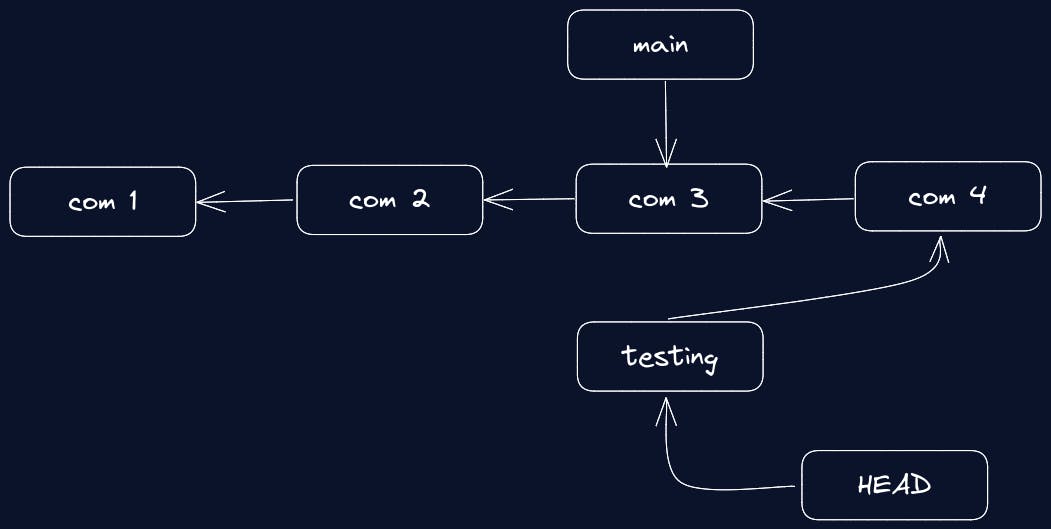
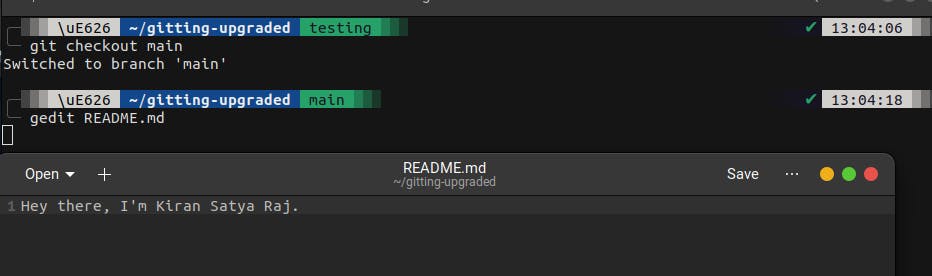
If you modified the files after switching to another branch and didn't commit them, Git wouldn't allow us to switch to the
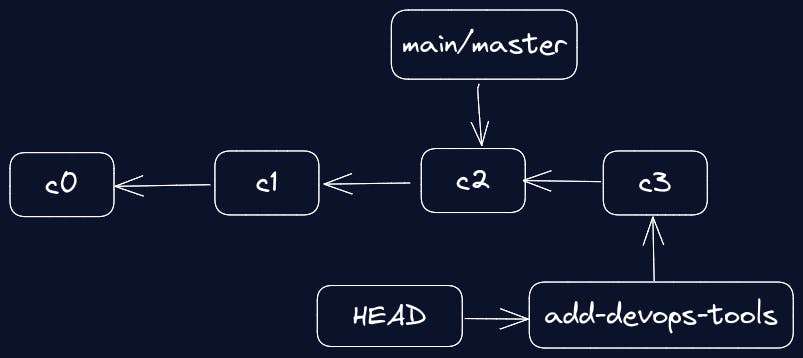
mainbranch, but you can switch, you'll figure that out when dealing with git amends and stashing, for now, proceed this wayAfter this, our commit tree should be looking like this, head points to the
add-devops-toolsbranch since it's your working branch, and the contents of both branches would be different
Committing Changes to Another Branch
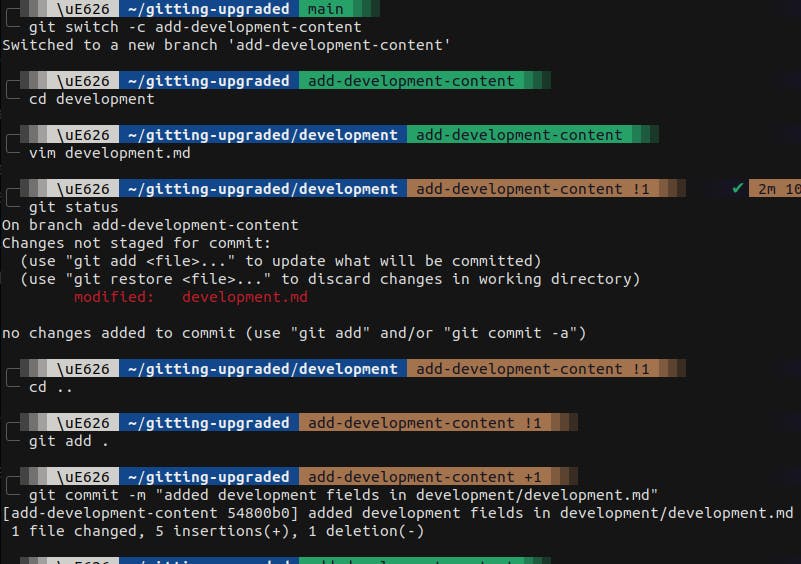
- Let's switch back to the
mainbranch, create and switch to a new branch to modify another file, and commit the changes
- Let's take a look at the commit tree

- Let's push the changes to the remote repo
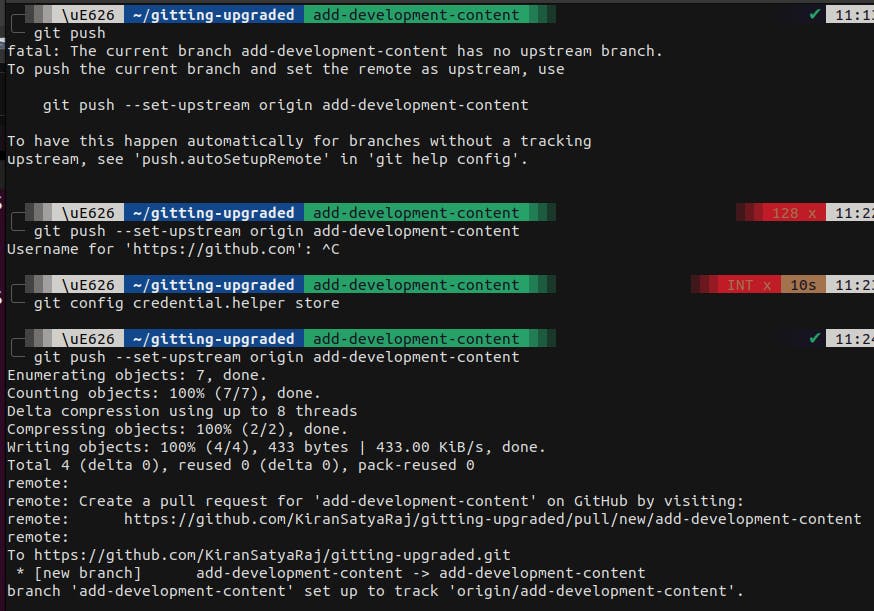
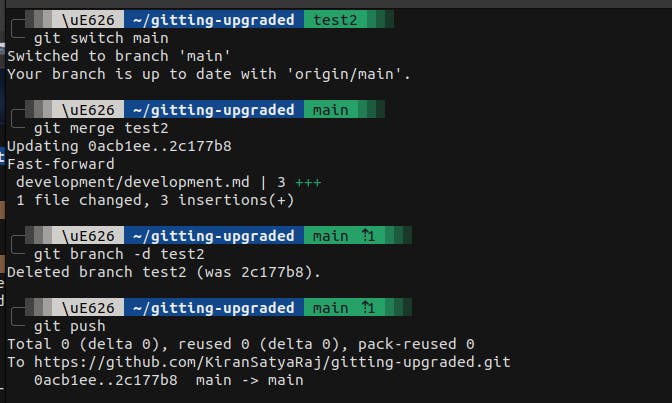
git merge | Merging Commits
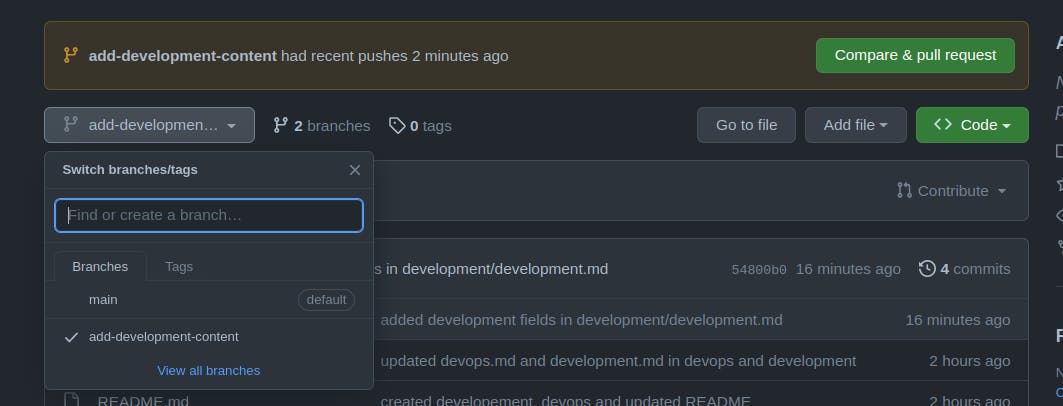
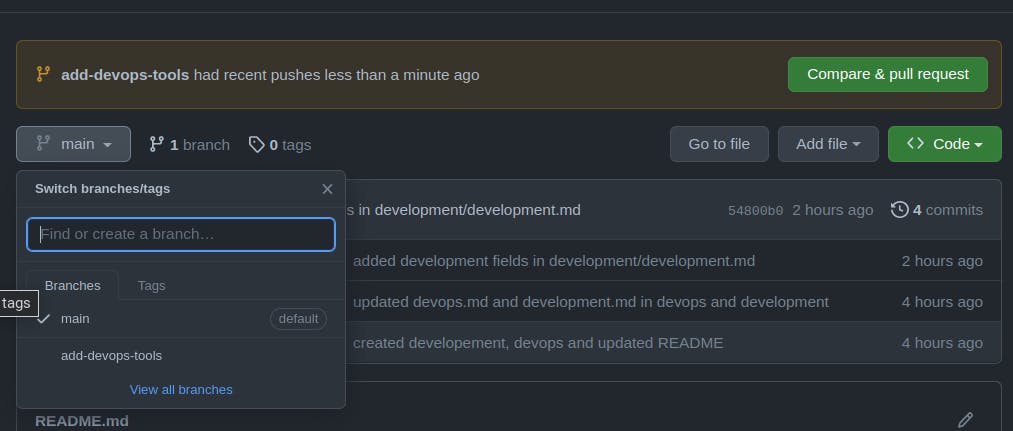
- Apart from the
mainbranch you had two more branches but only one of them was pushed hence only that branch is visible in the remote repo, you can also see thecompare & pull requestbutton which will merge the changes, that's one way of doing it
- The other way is through the CLI and it'll work because you are the owner of that repository
since the branch is merged, you can delete that branch, click view all branches in the main dropdown button to do that, but the branch would still be there in your local repo, to delete it use
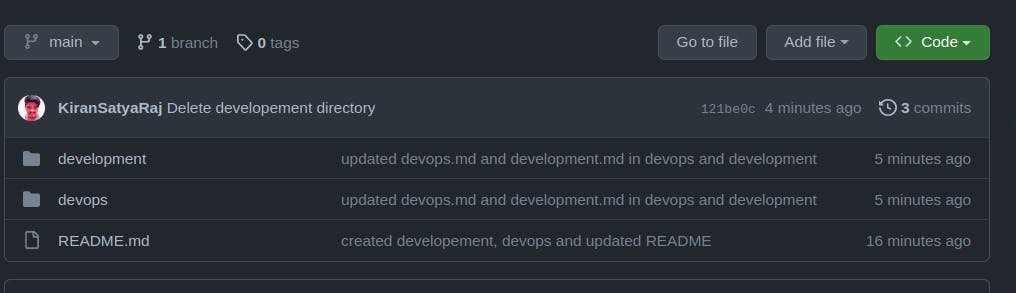
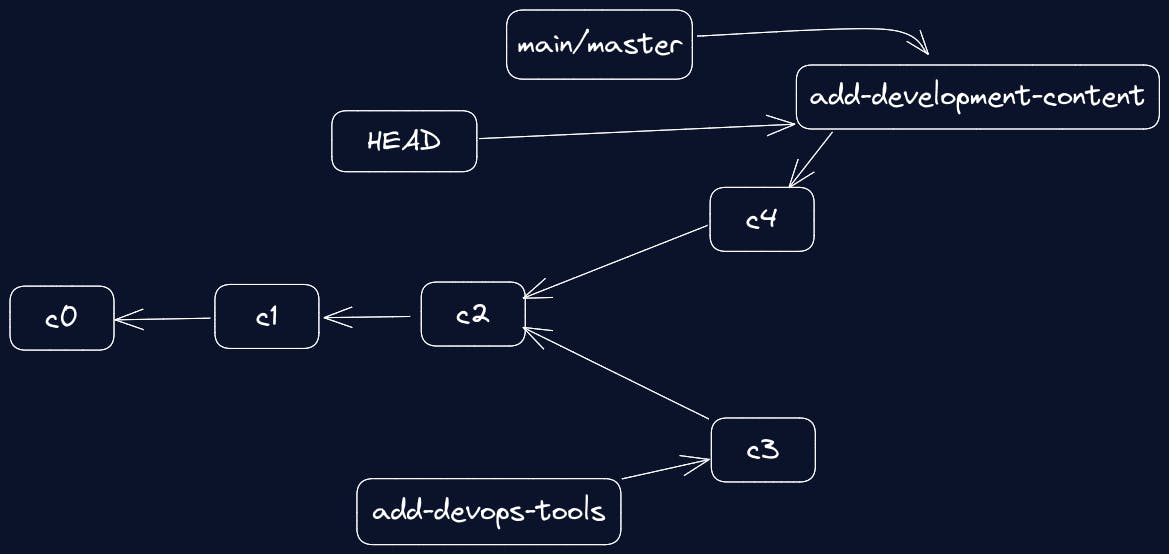
git branch -d <branch-name>Check the contents of the remote repo and the other branch which is not pushed, so the changes aren't visible yet, another look at your current commit tree,
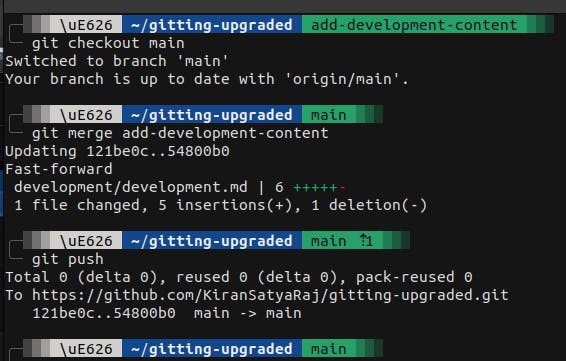
fast forwardin the git merge message means that the branch commit was on a linear path with themaincommit, themainpointer will be forwarded to that branch commitHEADwill change accordingly and the branch wouldn't be there since we deleted it
3-Way Merge
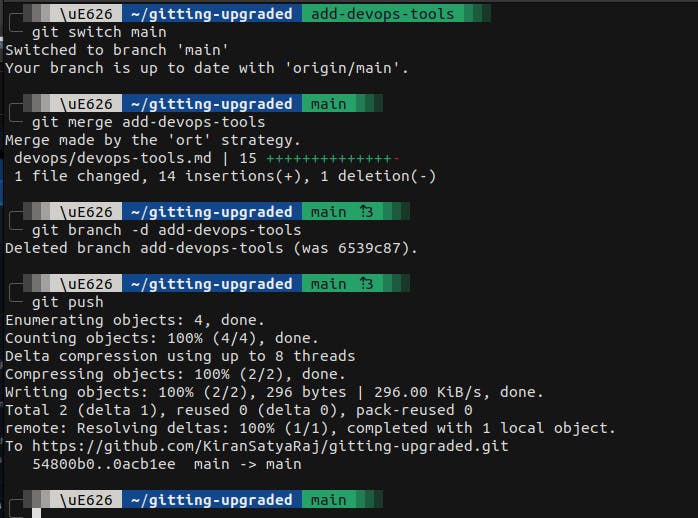
- Let's make another commit on the other branch which is in our local system and merge it with the
main, and push it to the remote repo
- Here's how it looks after committing the changes
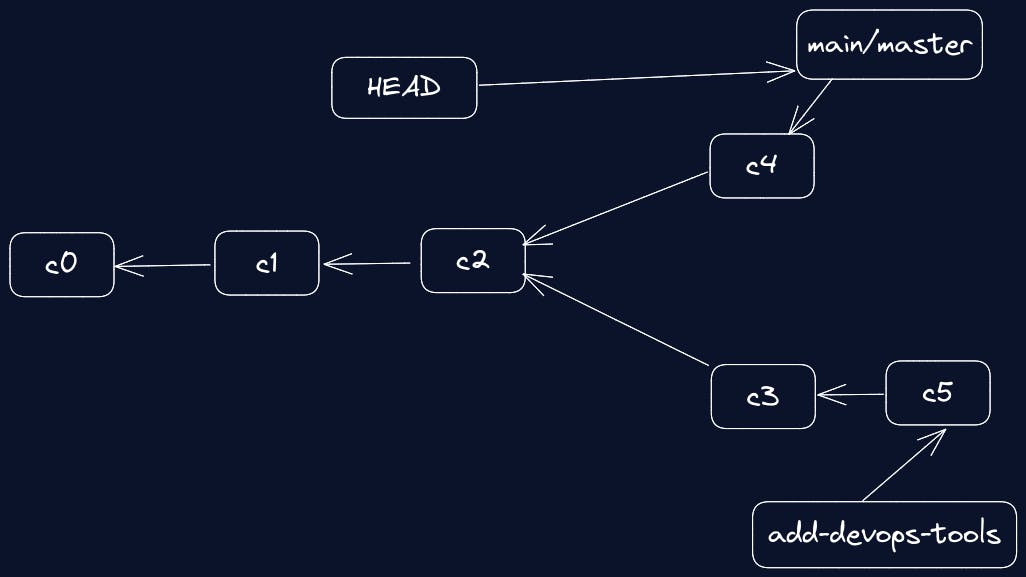
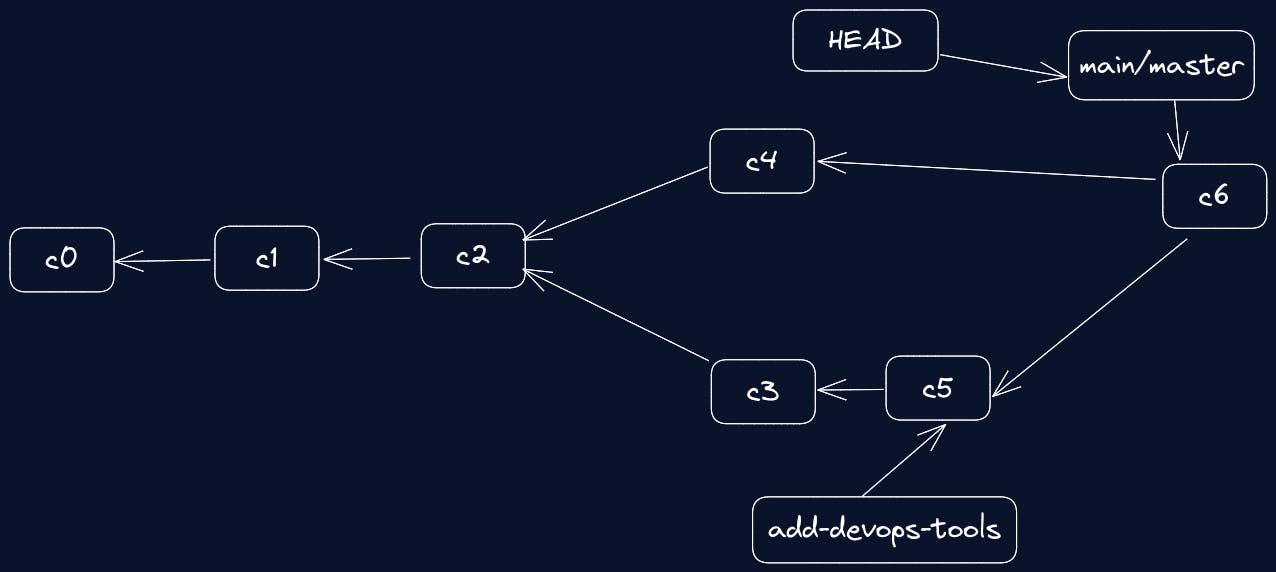
You want the
c5of theadd-devops-toolsbranch to get merged withc4of themainbranch, andc2is the common ancestor(commit) for both the branches, previously, while mergingc4withmainbranch Git usedfast-forwardingBut here
c5isn't the direct child ofc2, Git uses3-way mergeto merge the commits, it creates a new snapshot, and points the commitc6to that snapshot whose parents arec4 & c5taking required data from each of them
- If an editor opens up after executing
git merge <branch-name>, just doctrl + x, it looks like this

- here's how the commit tree looks like after the
3-way mergeand you can delete the branch from both local and remote repositories
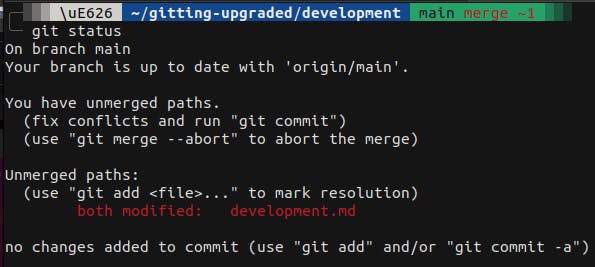
Merge Conflicts
- Let's know how merge conflicts occur, create and switch to that branch, modified a few files, stage, commit and push them
- Now switch back to the
defaultbranch, and do it again, make changes in the same file you did previously from another branch and push them

- delete the branch from the remote repo as well, and click on the
new pull requestof thetest1branch, it should show this

- try merging it from Git-CLI, we get an error because the changes are made on the same file and at the same place, Git cannot decide from which commit it should take changes from the lines from and lines above
=sign is already merged, and below=is the change coming at the same place from another branch
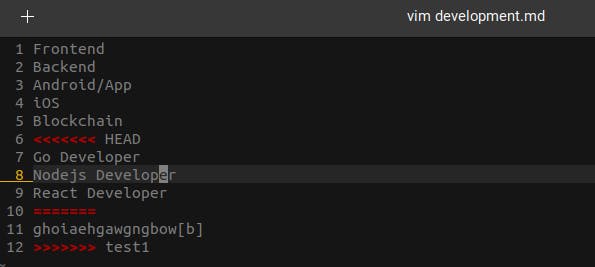
- Until this is resolved, you can't commit and move forward, so you can choose either version of them or both, just remove the
line 6, 10, and 12, for now, we don't want the random gibberish
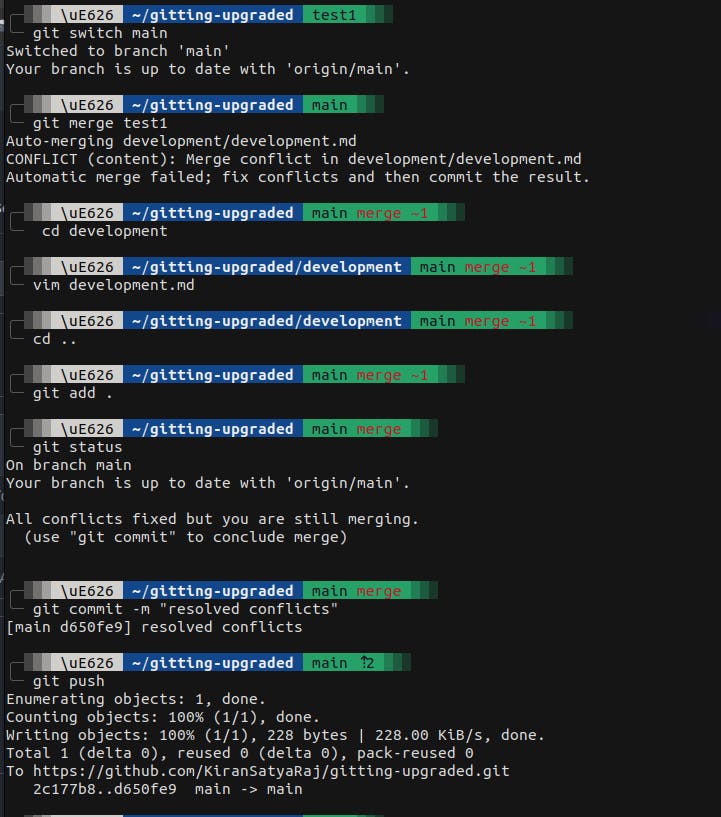
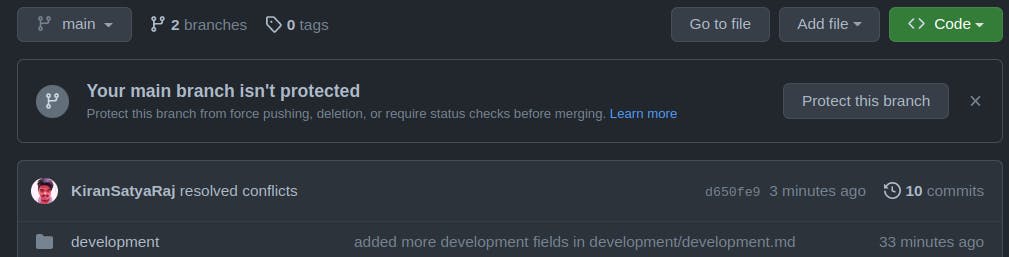
- check the remote repo, the latest commit should be
resolved conflictsand there's no need for thetest1branch anymore, go ahead and delete it, since you know how
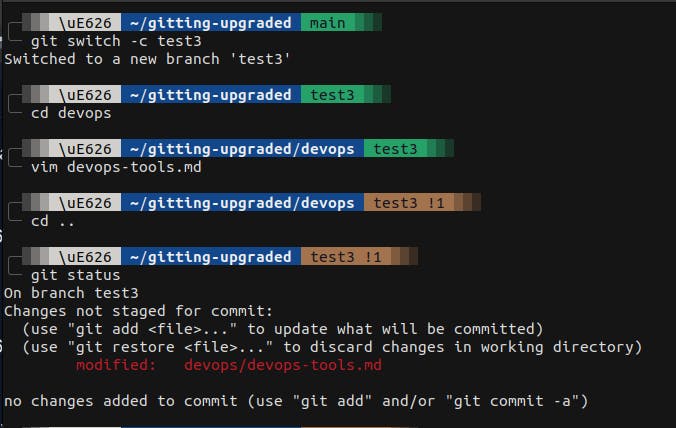
Branch Management
When you are working on a project, you might create a lot of branches and you can keep deleting them, but whenever you can get confused between branches, finding out the
last commitfrom each branch will help, the command for that isgit branch -vYou can also look up the merged branches to the branch you are currently in using
git branch --merged, in your case you're in themainbranch so executing this command will show the branches merged withmainwhich istest1, if you do the same after switching totest1it won't show any excepttest1Similarly, you can also check branches that are not merged with the branch you currently in using
git branch --no-merged
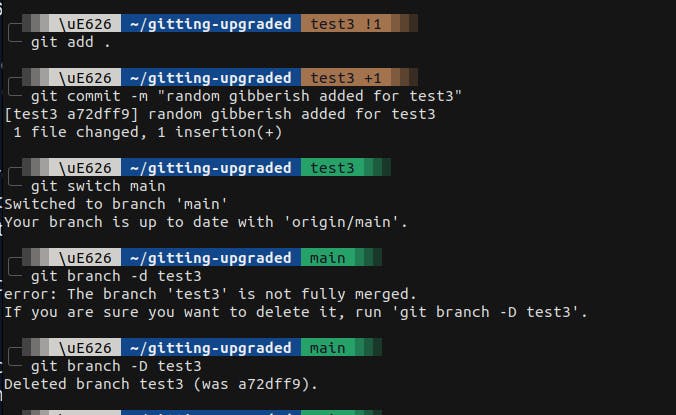
Deleting a branch that is not merged and has commits
- To delete a branch that has commits use
git branch -D <branch-name>, so create a branch, switch to it, modify a few files, stage them, commit them, switch back to the main usegit branch -d <branch-name>
git log
- To see the commit history of your git repo use
git log, if you want it more detailed usegit log --stat, and if you feel it's cluttered for a shorter format of your commit history usegit log --pretty=oneline
Conclusion
You have seen what are git branches and their practical usage
AND That's It, for now, Thanks for reading it till the end, Hope you found this helpful and got to learn something from this
Please share your feedback, that will help me a lot
This a blog version of this Git and GitHub Masterclass by Apoorv Goyal
Keep Working Hard and Happy Learning